






















MSSQL Database Repair: Overcoming Corruption Challenges with Seattle Data Recovery
- Details
- Written by: Seattle Data Recovery
- Category: Database Recovery
MSSQL Database Repair
Seattle Data Recovery repairs existing databases when database files cannot be opened because of file corruption. Seattle Data Recovery scans and searches the constituent parts of the database to restore its integrity. When MSSQL database files cannot be opened, Seattle Data Recovery works around inaccessible or damaged files to recover the rest of your tables.
In today's data-driven landscape, the integrity of database systems is paramount. Unfortunately, over time, databases can become susceptible to corruption, leading to critical disruptions in operations. For organizations relying on Microsoft SQL (MSSQL), understanding the intricacies of database repair is essential. In this comprehensive guide, we delve into the realm of MSSQL database recovery, providing insights into common corruption errors, methodologies for diagnosing issues, and effective recovery strategies, all while highlighting the specialized services of Seattle Data Recovery.
Read more: MSSQL Database Repair: Overcoming Corruption Challenges with Seattle Data Recovery
Brain Surgery for Your Hard Drive: Pros Rescue Data from Bad Controllers
- Details
- Written by: Seattle Data Recovery
- Category: Seattle Data Recovery
When Your Drive's Brain Melts: A Friendly Tour of Controller Disasters
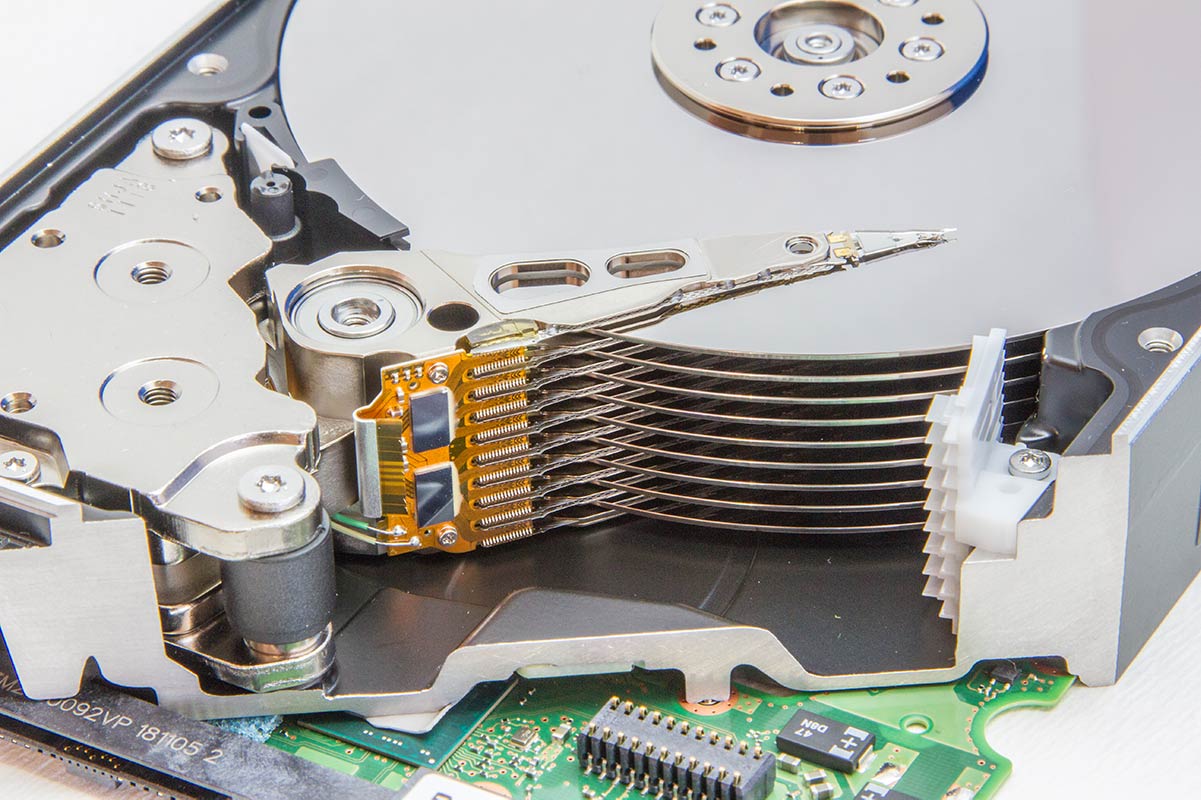
Hard drives and SSDs may look like simple little bricks of storage, but under the hood, they're more like tiny computers. At the center of that mini‑computer sits the controller: the "brain" that decides how and where every bit of data gets read, written, and organized. When the controller dies, your data hasn't vanished—it's just suddenly trapped behind a very confused, non‑responsive bouncer.
That's where the magic (and madness) of professional data recovery comes in. Data recovery for hard drives with bad controllers is all about either fixing the brain, impersonating it, or completely sneaking around it. This can mean swapping ROM chips, using OEM boards, connecting drives through specialized HBA cards, or—when things get really serious—moving platters in a cleanroom and reading data directly. In all cases, the mission is simple: clone the data before anything gets worse.
Why Controllers Fail: Tiny Brains, Big Problems
Before we talk heroics, let's talk villains. Controller failures usually fall into a few notorious categories. First, you have good old-fashioned electrical damage: power surges, cheap power supplies, lightning strikes, or even a plugged‑in‑upside‑down adapter on an external enclosure. The controller's PCB (printed circuit board) can burn, blow a fuse, zap a voltage regulator, or quietly fry a tiny component you can't even see without a microscope. The drive may look fine, but it behaves like a brick.
Then there's firmware corruption, the silent assassin. The controller doesn't just push bits; it also stores drive‑specific firmware and calibration data. If this firmware gets corrupted—by a sudden power loss mid‑update, a bug, or just aging—it can render a physically healthy drive completely inoperable. In some modern drives, even configuration data and defect tables live in hidden firmware areas. When those go wrong, the drive can spin up, click aimlessly, or disappear entirely from the system. The data is still on the platters or NAND chips, but the map to it has been shredded.
"Bypass the Brain": What Data Recovery Really Means
So, how do professionals rescue data when the controller has checked out mentally or physically? They treat the controller like a replaceable, patchable, or bypassable "brain." That's the core of hard drive and SSD recovery when controllers go bad.
In many cases, technicians perform intricate operations to bypass hard drive controller problems entirely. They may transplant the ROM chip from the original board, repair scorched traces, or pair the damaged drive with a matching OEM controller to trick the drive into waking up. For SSDs, specialized tools sometimes bypass the SSD controller logic by communicating directly with the NAND chips via test pads or chip-off methods. The big goal is always the same: get the drive to cough up enough life to image it sector by sector, then retire it forever.
The ROM Chip Heist: Most Common Fix for PCB Failures
Hard drive PCBs aren't interchangeable Lego pieces; they're more like keys cut for one specific lock. Each board stores unique calibration data, adaptive parameters, and configuration details in a ROM chip or embedded microcontroller. If you slap any random OEM board on a dead drive, you'll usually get nowhere—if you're lucky. If you're unlucky, you can make things worse.
That's why the ROM chip transfer is the go‑to move for PCB failure. Here's how it works: a professional first finds an exact OEM board—same model number, PCB revision, firmware family, and often even the same manufacturing batch. Then, under a microscope, they desolder the original ROM chip from your dead board and transfer it to the OEM board. With this little transplant, the OEM board suddenly "thinks" it's your original controller. The drive can now recognize its own platters and metadata, and if all goes well, it comes back to life just long enough for a full image.
Donor Board Swaps: The Spicy, Risky Shortcut
Every so often, someone gets lucky, and a straight controller board swap actually works. But as a rule, this is the more dangerous, "hold my coffee" approach. Without that ROM swap, the OEM board doesn't know the subtleties of your specific drive: head maps, calibration data, defect lists, and other drive‑unique information won't match.
Consequently, recovery labs treat full OEM board swaps as last‑resort experiments or as a way to test basic electrical behavior. It's less common and riskier than the carefully targeted ROM move. If you try to bypass hard drive controller issues by jamming on a random OEM, you may see the drive spin, click, or even mis‑calibrate, worsening internal damage. That's why professionals combine board swaps with ROM transfers, firmware tweaks, and safe imaging tools, not just hope and guesswork.
Cleanroom Drama: Platter Transplants and "Last-Chance" Surgery
Sometimes the controller isn't just slightly crispy—it's an absolute disaster. Maybe the board burned so hard it scorched the motor contacts, or a power surge damaged more than just the electronics. If the data is truly mission‑critical and the electronics route is a dead end, the next step may be the big one: platter transplant.
In a cleanroom, technicians carefully open the hard drive, remove the platters (the shiny "CD‑like" disks), and move them into an identical OEM drive with good heads, motor, and electronics. This is about as delicate as it sounds: fingerprints, dust, or a misaligned spindle can destroy the thin magnetic layer that actually holds your data. After reassembly, the OEM‑hybrid drive is powered up with a carefully tuned controller. If the stars align, the lab can finally access the platters and start imaging your data. This is almost always a one‑shot operation—and definitely not DIY territory.
SSD Controllers: When "Smart" Storage Gets Stubborn
If hard drives are like turntables, SSDs are more like complex robots: powerful, fast, and packed with logic. That logic lives inside the SSD controller, which does much more than push bits around. It handles wear‑leveling, bad block management, TRIM, garbage collection, and translation from logical block addresses (what your OS sees) to physical NAND locations (where the electrons live). When this brain fails, it often fails loudly in terms of data accessibility.
Here's the fun twist: in many SSD recoveries, the NAND chips are fine, but the controller is either dead, partially malfunctioning, or its firmware has gone sideways. To bypass SSD controller failures, pros may use very case‑specific techniques. Sometimes they coax the controller into a special "tech mode" using factory-level tools; other times, they resort to "chip‑off" methods, physically removing the NAND and reading it with specialized equipment. Either way, successful recovery isn't just about raw data—it's about reconstructing the complex map the controller once used, bit by bit, across multiple NAND dies and channels.
RAID Controllers vs. HBAs: Who's Actually in Charge Here?
So far, we've lived inside individual drives. But what about RAID arrays, NAS boxes, and big storage servers? In those setups, there's another layer of brains: the RAID controller. It creates logical volumes, spreads parity, maintains stripes, and tracks which drive holds which chunk of data. When that controller fails, all the drives may be perfectly healthy, but the system can no longer assemble them into a coherent volume.
This is where Host Bus Adapters (HBA cards) swoop in like calm, unflappable translators. Unlike RAID controllers, HBAs don't impose RAID logic or virtualization layers. Instead, they present each drive "as is" to the operating system and recovery software. Seattle Data Recovery, for example, designs HBA SATA cards for PCIe specifically to give data recovery professionals direct, stable access to 2.5" SATA hard drives, 2.5" SATA SSDs, and M.2 SATA SSDs without RAID interference. By moving drives from a failed RAID controller to an HBA, specialists can work with each disk individually and reconstruct arrays virtually in software.
HBAs in Action: Bypassing RAID Chaos and Talking to Raw Drives
Think of an HBA as a multilingual interpreter who refuses to embellish your story. Instead of mixing drives into arrays, it simply exposes each one to the host system in its raw, native form. In data recovery, this is gold. Pros use HBA cards—often LSI models like the 9211‑8i or 9300‑8i flashed into IT mode—to maintain clean, direct communication with SAS and SATA drives during imaging.
Once the drives are behind an HBA, recovery software such as R‑Studio, UFS Explorer, or RS RAID Retrieve can analyze them individually, determine RAID parameters (stripe size, order, parity, offsets), and virtually rebuild the array. This means that even if drives were in a complex RAID 0, 5, or 6, or tucked inside a misbehaving NAS, the lab can bypass the original RAID controller's logic and piece everything together in software. Meanwhile, the HBA quietly manages low‑level SAS/SATA commands so the imaging tools can clone at the safest possible pace for fragile drives.
Imaging Before Everything Explodes: Why Cloning Comes First
Once a drive finally responds—whether thanks to a ROM swap, a OEM board, a platter transplant, or an HBA connection—the clock starts ticking. Drives with bad controllers often have other lurking issues: marginal heads, weak sectors, heat‑sensitive components. That's why professionals don't explore your file tree first; they image.
Imaging is the art of copying every readable sector, in the safest possible order, to a stable destination drive or image file. Specialized hardware and software pause on bad sectors, return later, alter read strategies, and avoid stressing the drive unnecessarily. In RAID scenarios, each member gets imaged individually through an HBA. Only once the clones are complete do specialists work on logical reconstruction—file systems, RAID geometry, partition tables, and the like. The damaged source stays powered off as much as possible, serving only as an emergency backup if a sector must be re‑read.
Software Sidekicks: Virtual Rebuilds, Not Controller Roulette
After hardware heroics, the software takes the stage. For single drives, tools like R‑Studio or similar suites analyze file systems (NTFS, exFAT, ext4, APFS, etc.), build file trees, and allow granular recovery from raw images. They can recover deleted files, verify integrity, and safely export data to new storage.
In RAID recovery, software performs more acrobatics. It examines each disk image, looks for RAID metadata signatures, and uses heuristics or manual input to infer parameters: RAID type, stripe size, parity rotation, disk order, offsets, and more. Once it cracks the puzzle, it virtually "rebuilds" the original volume in memory—without ever touching the real drives. This is where those HBA‑based raw images shine, because they show the drives exactly as the original RAID controller saw them, minus any firmware bugs or mid‑failure corruption from the hardware.
When to Stop DIY and Call Someone with a Microscope
Some drive issues lend themselves to DIY attempts—accidentally deleted files, for instance, from an otherwise healthy drive. But controller failures? Those sit much closer to the "do not poke" end of the spectrum. If your drive isn't detected at all, makes clicking or grinding noises, or shows scorch marks or a burnt smell around the PCB, powering it repeatedly can accelerate damage, especially to heads and platters.
If the data truly matters—business records, irreplaceable photos, legal documents—this is exactly when a professional lab earns its keep. They have OEM parts, micro‑soldering tools, cleanrooms, HBA cards, firmware utilities, and most importantly, experience. They know when to attempt a ROM swap, when to bypass hard drive controller logic entirely, and when a platter or chip‑off transplant is justified. The line between "maybe recoverable" and "gone forever" is often defined by how much experimentation a drive has endured before it reaches a lab.
The HBA Hardware Stack: Quiet Heroes of the Recovery Bench
On a data recovery workbench, HBA cards are the unsung heroes quietly running the show. An LSI 9211‑8i in IT mode might be handling a bank of SATA HDDs from a dead NAS, while a 9300‑8i manages 12Gb/s SAS drives from a server that suffered a RAID controller meltdown. Meanwhile, Seattle Data Recovery's own HBA SATA PCIe cards help labs connect 2.5" SATA HDDs, 2.5" SSDs, and M.2 SATA SSDs with secure write‑blocking, ensuring nothing on the source drive is accidentally modified.
Because they don't impose RAID logic, HBAs are ideal in forensic‑grade situations as well. They ensure direct-drive access in a verifiable, repeatable manner—critical for imaging in legal cases or for compliance. In everyday recovery, they keep data pipelines steady and reliable, letting imaging tools retry weak sectors, adjust read timing, and avoid timeouts more gracefully than many onboard controllers or cheap USB docks.
Bypassing Controllers: Practical Scenarios from the Field
Let's walk through a few common real‑world patterns where bypassing controllers makes the difference between "sorry" and "success."
First, imagine a RAID 5 array on a small-business server where the controller card fails catastrophically. The drives themselves are fine, but the array is gone from the OS. A recovery lab pulls the drives, hooks them to an HBA card, and images each disk individually. Next, they use specialized RAID recovery software to deduce stripe size, parity distribution, and disk order. The array is then rebuilt virtually, and file-level recovery begins—no need to repair or replace the original RAID controller.
Second, consider a single desktop drive that suffered a power surge. The motherboard's fried, the PSU smells smoky, and the hard drive won't spin. In the lab, a tech spots a burnt TVS diode and a blown fuse on the controller PCB. They grab a matching OEM, perform a ROM chip transplant, and the drive spins to life. Instead of browsing files, they immediately clone the drive using imaging hardware. Once the clone is complete, they work on it logically; the original drive goes into quiet semi-retirement on the shelf, just in case.
SSD Adventures: Bypassing Smart Controllers the Smart Way
SSD recoveries often require more finesse, but the principles remain the same: stabilize, bypass, and image. If an SSD shows up in the BIOS with the wrong capacity, "frozen" SMART data, or no detection at all, professionals suspect a controller or firmware issue. Depending on brand and model, they may access vendor‑specific diagnostic modes, apply firmware patches, or reconfigure how the controller enumerates the NAND.
If those methods fail, the party gets more intense. In chip‑off recovery, technicians carefully desolder NAND chips, clean them, and mount them into specialized readers. Then they use software to interpret raw dumps from multiple dies and channels, simulating the SSD controller's job. This is essentially a "bypass SSD controller" strategy at the deepest level: the controller is out of the picture, replaced by a painstaking software model that reconstructs pages, blocks, and logical addressing. It's slow, complex, and hardware‑specific—but when family photos or critical records are at stake, it can be the difference between zeros and stories.
How to Accidentally Make Things Worse (So You Can Avoid It)
If you take nothing else away from this tour of controller carnage, remember this: repeating power‑on tests and random tinkering are the enemy of successful recovery. Each spin‑up on a borderline drive can push weak heads over the edge or scrape that fragile magnetic coating. Similarly, plugging a suspect drive into a cheap USB dock, swapping PCBs without ROM transfers, or trying "firmware hacks" from random forums can turn a minor issue into a fatal one.
When in doubt, slow down. Don't run filesystem repair tools (like CHKDSK or fsck) on a drive that's clicking, vanishing, or intermittently detected—especially not before imaging. Don't open the drive casing in your living room. And don't hot‑swap boards and hope for a miracle. Instead, if the data matters, power down and talk to a professional or at least adopt a cautious, imaging‑first approach on a separate machine.
How Pros Decide: Repair, Bypass, or Go Full Surgery?
Behind every recovery is a diagnostic decision tree. When a drive hits the bench, techs check power rails, controller components, ROM integrity, firmware logs (if accessible), and mechanical health. If the issue is clearly PCB‑related and the heads/platters seem healthy, they'll try controlled PCB repair or a ROM‑based board transplant. That's the most common and cost‑effective path.
If the electronics route stalls or mechanical symptoms appear—clicking, stiction, no spin—they'll consider internal inspection in a clean environment. If they find head crashes or significant internal damage, they may switch straight to platter or head stack work, treating the controller as only one part of the puzzle. For SSDs, if firmware‑level freedom doesn't exist or the controller dies completely, they weigh the feasibility and cost of chip‑off recovery. Every step aims at one question: what's the safest, most effective way to get an image before further degradation?
Prevention: How Not to End Up in Controller Purgatory Again
No blog about heroically saving drives from bad controllers is complete without a gentle reminder: the best recovery is the one you never need. Controller failures are often random, but you can stack the odds in your favor.
Use quality power supplies and surge protection, especially for desktops, servers, and NAS units. Avoid running drives at high temperatures; good airflow matters more than fancy RGB lighting. Replace aging RAID controllers and firmware‑buggy devices before they become historical artifacts. Most importantly, maintain multiple backups—ideally with versioning and offsite or cloud copies—so a single controller failure is an inconvenience, not a catastrophe. If your only copy of irreplaceable data lives on a single spinning disk from 2012, consider this your polite but urgent nudge.
The Big Picture: Brains, Bypasses, and the Art of Not Giving Up
At the end of the day, data recovery for bad controllers is part science, part surgery, and part patience. Sometimes it's as simple as a ROM chip transplant and careful imaging; other times it's a full‑blown platter or chip‑off adventure. Along the way, tools like HBA cards, write‑blocking software, and specialized imaging suites make it possible to bypass hard drive controller failures, bypass SSD controller quirks, and talk to storage at its most fundamental level.
The good news? A dead controller isn't the same as dead data. With the right combination of equipment, technique, and restraint, there's often a path to your files. Whether it involves a cleanroom, custom HBA hardware from a specialist like Seattle Data Recovery, or some quietly heroic reverse‑engineering, the goal is always the same: get your bits back, safely, before the failing hardware runs out of second chances.
Read more: Brain Surgery for Your Hard Drive: Pros Rescue Data from Bad Controllers
When the Controller Dies but Your Data Can’t: Seattle Data Recovery Bypasses Bad Boards with HBA Magic
- Details
- Written by: Seattle Data Recovery
- Category: Seattle Data Recovery
Your Drive Isn't Dead, Its "Brain" Is – And That's Good News
When a hard drive or SSD stops working, most people assume the worst: "My data is gone forever." In reality, that is often not true. Very frequently, what has failed is not the actual storage media, but the controller – the tiny "brain" board that tells the drive how to behave, how to talk to your computer, and how to read the sectors where your data lives.
At Seattle Data Recovery, that difference is everything. Because if the magnetic platters in an HDD or the NAND chips in an SSD are still intact, your data probably still exists. It's just trapped behind a faulty controller that can no longer communicate properly. Instead of giving up, we take a different approach: we bypass the failure. And one of the most powerful tools we use to do this is our line of LSI-based HBA cards, carefully tuned and, in some cases, manufactured or customized specifically for recovery work.
Why Controllers Fail – And Why That Shouldn't Decide Your Data's Fate
Controllers fail for many reasons. Sometimes a power surge quietly burns out a tiny component on the PCB. Other times, a firmware update goes wrong, and the code that runs the drive becomes corrupted. Even a slightly failing power supply or poorly designed external enclosure can slowly cook onboard electronics over time. The symptoms can range from total silence (no detection at all) to erratic behavior, clicking, or sudden disconnections under load.
Traditionally, once the controller failed, technicians tried simple tricks: swapping the whole controller board, hoping for a miracle. But modern drives store unique, adaptive data in ROM chips and service areas on the platters or NAND. Without carefully handling this adaptive information, a simple board swap rarely works and can even make things worse. That's why sophisticated methods – ROM chip transfer, firmware repair, OEM components, and, crucially, direct, controller-bypassing access – are now essential. That's exactly where HBA technology shines.
The Secret Weapon: What an HBA Card Actually Does
An HBA LSI card is a Host Bus Adapter that bridges your server's PCIe bus and your storage devices, such as SSD and HDD drives. Instead of hiding your disks behind a RAID abstraction, an HBA exposes each drive directly to the operating system. In other words, it acts like a high-performance, multi-lane highway between your data recovery workstation and the raw disks.
Unlike traditional RAID controllers that insist on building arrays and presenting "virtual" drives, an HBA – especially one flashed to "IT Mode" – presents each physical disk as-is. For data recovery, that is pure gold. It allows Seattle Data Recovery engineers to interact with each drive at a very low level, issue custom commands, read around bad areas, and image sectors even when conventional systems choke. Moreover, our experience in manufacturing custom HBA cards and tuning firmware enables us to fine‑tune behavior for difficult SSD and HDD recovery scenarios.
Why Seattle Data Recovery Relies on HBAs Instead of Traditional RAID
RAID cards have a job: performance and redundancy in production. But they are the wrong tool when something goes wrong. A failed RAID controller can lock your disks behind proprietary metadata and inconsistent interpretations of the array. When you connect RAID-attached drives to another RAID card, it may insist on initializing them, wiping your chance at recovery.
By contrast, when we connect your drives to our HBA LSI backbone, we get direct, unfiltered disk access. The OS sees individual drives, not some mystery "virtual volume." That direct access lets our specialized data recovery software reconstruct RAID arrays virtually – safely – without altering the original disks. As a result, we can rebuild complex RAID 0, RAID 5, RAID 6, and even nested configurations from raw data, not guesses. For you, this means a much higher probability of a successful recovery with integrity intact.
Bypassing the Controller on HDDs: From Burnt Boards to Readable Platters
In traditional hard disk drives, the controller board sits on the outside of the drive, connected to the internal head stack and spindle motor via a multi-pin connector. When that controller burns out, the computer no longer recognizes the device. However, the platters – the spinning disks that actually store your bits magnetically – are often still perfectly fine.
At Seattle Data Recovery, we start with an electrical and diagnostic evaluation. If the PCB is damaged but the heads and platters appear healthy, we look for a OEM board that matches the exact configuration. Then we carefully transfer the ROM chip (and sometimes other adaptive components) from your original board to the OEM board. This restores the unique calibration data your drive needs. Once we've restored logical function, we do not simply plug it into any computer; instead, we connect it to our LSI HBA-powered recovery systems. That combination – repaired logic plus HBA pass‑through – lets us extract a clean, sector-by-sector image while minimizing stress on the drive.

Beyond Icons and Folders: Mastering APFS Formats and Data Recovery on Modern Macs
- Details
- Written by: Seattle Data Recovery
- Category: Apple Computer Data Recovery
APFS at the Core: Why the File System Matters More Than You Think
When you save a file on your Mac, you probably focus on the app, the filename, or where you store it. Yet under the surface, the file system quietly determines how fast your data is written, how safely it's stored, and how easily it can be recovered when something goes wrong. With macOS 10.13 High Sierra and later, Apple shifted from the aging HFS+ to APFS (Apple File System), redefining how storage works on Macs, iPhones, iPads, and even Apple TV.
APFS is not just a new label in Disk Utility. It is a ground-up redesign tailored to flash and SSD storage, with built‑in features for encryption, snapshots, cloning, and space sharing. For everyday users, this translates to faster performance, better stability, and more secure data. For IT professionals, digital forensics experts, and Seattle Data Recovery specialists, APFS changes how diagnosis, recovery, and risk management must be approached.
Four Faces of APFS: Understanding Your Volume Format Options
When you open Disk Utility on a Mac running macOS 10.13 or newer and choose to format or add a new volume, you see four APFS variants. They might appear similar, but the choice you make here influences app compatibility, security posture, and future data recovery options. By design, each APFS volume within a single APFS container can use its own format, which introduces flexibility—but also complexity.
The default format for most users is APFS (case‑insensitive and unencrypted). This standard choice ensures maximum app compatibility, since many macOS applications assume case-insensitivity. However, APFS (Encrypted), APFS (Case-sensitive), and APFS (Case-sensitive, Encrypted) are available for users with stricter security or Unix-like workflow requirements. Selecting the right one requires understanding what each variant does and, just as importantly, how it impacts troubleshooting and recovery.
Standard APFS: The High-Performance Default for Most Macs
What "Standard" APFS Really Means
The plain "APFS" option in Disk Utility refers to the basic format: case-insensitive and unencrypted. In practical terms, this means the file system treats "Report.docx" and "report.docx" as the same file name. This behavior mirrors HFS+ and Windows' NTFS defaults, minimizing conflicts with software designed for case-insensitive operation.
Standard APFS is optimized for SSDs and modern flash storage, improving responsiveness when opening files, copying large directories, or launching apps. It leverages copy‑on‑write metadata, instant cloning, and snapshots to keep performance high while reducing the likelihood of corruption during crashes or power failures—consequently, most consumer Macs ship with this format out of the box.
Why Standard APFS Is Often the Safest Bet
From a compatibility standpoint, standard APFS is usually the safest and least problematic choice. Many applications—especially legacy or poorly maintained ones—implicitly assume that the file system does not differentiate between uppercase and lowercase names. Choosing a case-sensitive format can expose bugs or cause subtle breakage, such as installers failing or apps refusing to launch.
For data recovery, the absence of built‑in volume‑level encryption simplifies certain aspects of analysis and reconstruction. While APFS is still more complex than HFS+, unencrypted volumes eliminate the additional cryptographic layer that can render certain recovery efforts futile without a valid password or key. As a result, standard APFS volumes typically give Seattle Data Recovery specialists more room to maneuver when dealing with logical or minor hardware failures.
Read more: Beyond Icons and Folders: Mastering APFS Formats and Data Recovery on Modern Macs
When Modern Magic Backfires: Why APFS Data Recovery Is So Incredibly Hard
- Details
- Written by: Seattle Data Recovery
- Category: Apple Computer Data Recovery
APFS: Brilliant by Design, Brutal for Data Recovery
Apple's APFS (Apple File System) is a modern marvel. It brings encryption by default, blazing‑fast performance on SSDs, snapshots, cloning, and space sharing. For everyday use, this design is a clear upgrade over HFS+. Yet when something goes wrong, and you need to recover data, those same benefits quickly become formidable obstacles.
Rather than being "just another file system," APFS fundamentally changes how and where data lives on your disk. The result is that approaches that worked reliably on older file systems break down under APFS. Even seasoned professionals and specialized labs—whether in large forensic outfits or boutique firms offering Seattle Data Recovery and similar services—face entirely new constraints, many of which are hard limits rather than mere technical challenges.
In this post, we will unpack why APFS is so difficult to work with in a recovery scenario. We will trace the challenge back to its core features—strong encryption, SSD optimization through TRIM, and a far more complex internal structure. Along the way, we will clarify when recovery might be feasible and, more importantly, when it is not, no matter who you hire or what tools you buy.
Security as a Wall, Not a Fence: Understanding FileVault on APFS
One of APFS's headline features is strong encryption. On modern Macs, Apple enables FileVault—or at least FileVault‑level encryption—by default on most internal SSDs. This is not a cosmetic layer; it is deeply integrated into the file system and hardware. From a security standpoint, this is a huge win. From a data recovery standpoint, it is a nearly immovable wall.
APFS ties encryption keys to specific metadata structures—container superblocks, volume superblocks, and keybags. These elements work together to unlock the file system and interpret the contents of the disk. When everything is intact and you have the password, the process is seamless and invisible. However, even minor corruption in those tiny key‑related structures can render the entire volume unreadable, despite the underlying files still "existing" as encrypted blobs.
Unlike some older or weaker encryption systems, there is no backdoor for APFS encryption. Apple does not maintain a secret override key, and no commercial or open‑source software can bypass FileVault if the required credentials and metadata are missing. This reality is central to understanding modern APFS data loss: sometimes, the best lab in the world cannot help.
Read more: When Modern Magic Backfires: Why APFS Data Recovery Is So Incredibly Hard
Page 1 of 265