
Call 1 (425) 406-1174 to start a Data Recovery!
Hard Drive Repairs
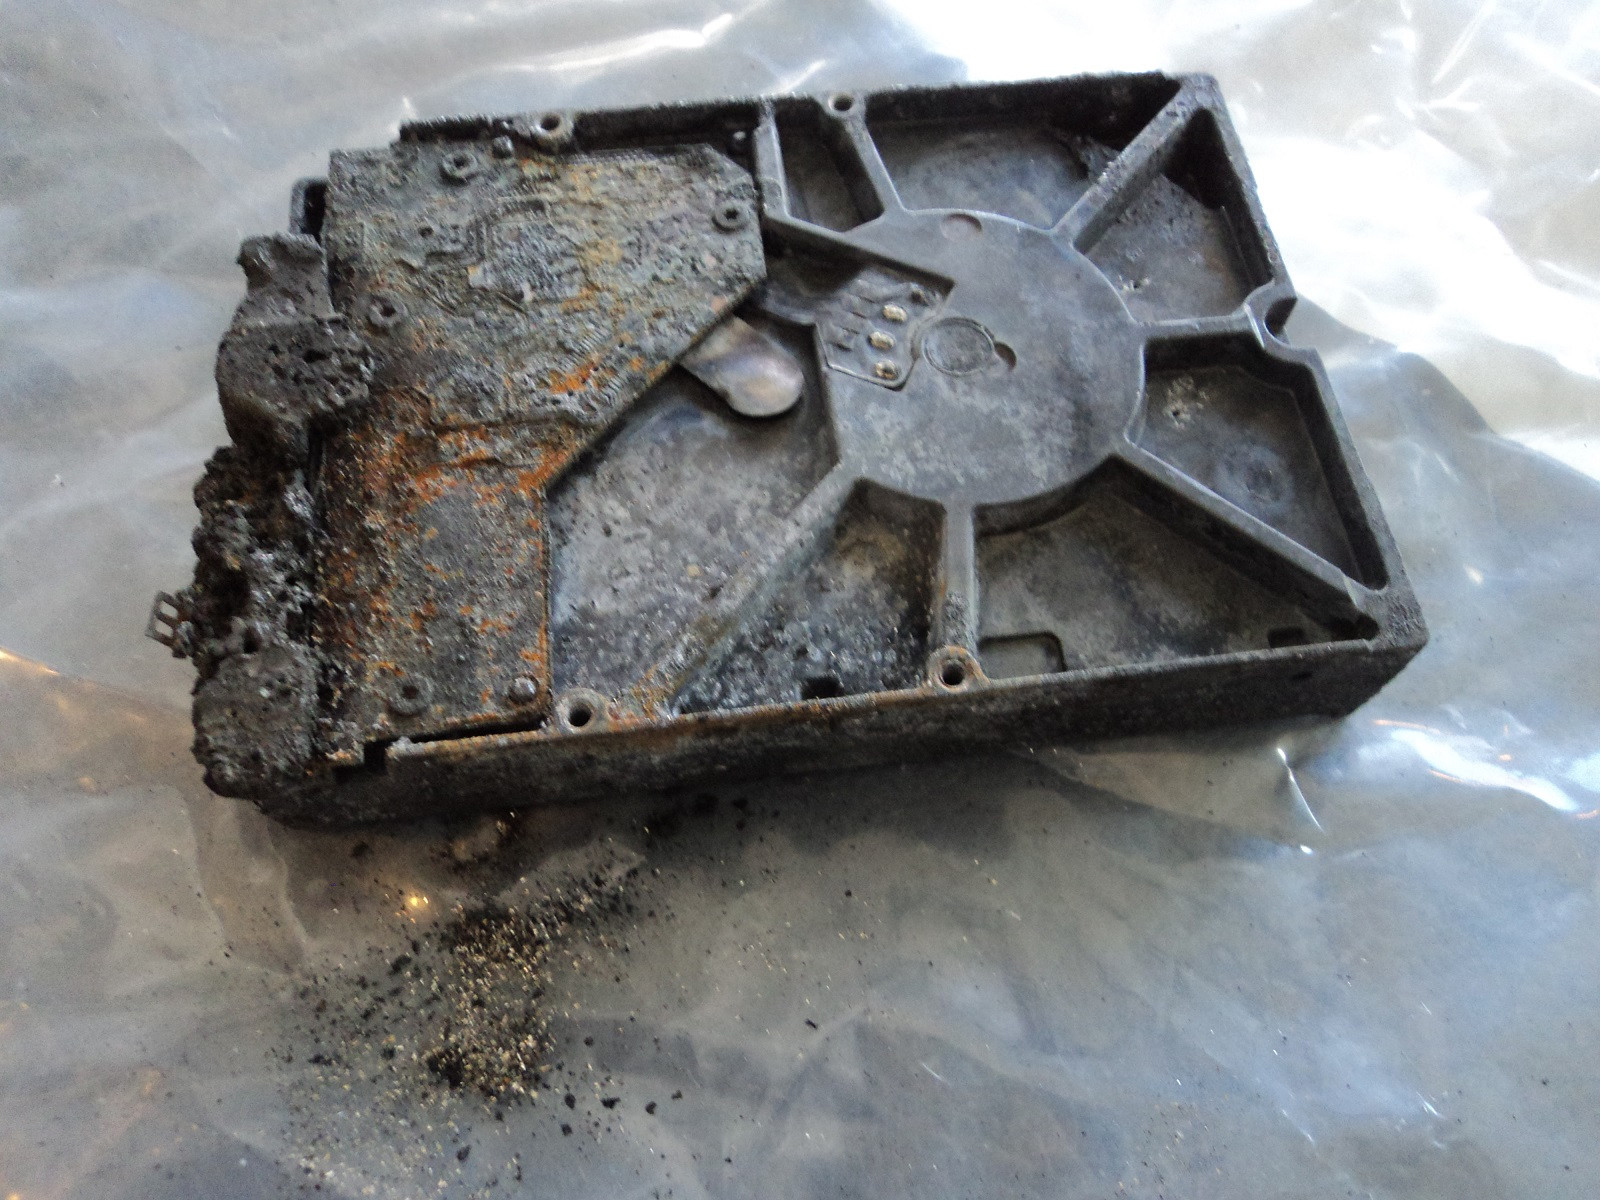
Hardware-Level Hard Drive Repair for All Brands by Seattle Data Recovery
At Seattle Data Recovery, we distinguish between basic data recovery and true hardware-level hard drive repair. When a storage device experiences a mechanical or electronic failure, running recovery software is completely useless—and highly dangerous. The drive must first be physically repaired inside a controlled environment so that it can stabilize long enough to safely extract its data.
Our dedicated laboratory is fully equipped with advanced micro-soldering stations, proprietary firmware terminal tools, and an ISO-certified cleanroom environment. This advanced infrastructure allows our engineers to perform component-level diagnostics and physical restoration across all major hard drive manufacturing brands.
Universal Failure Tiers & Brand-Specific Engineering Protocols
While all hard drives utilize magnetic platters to store data, individual manufacturers rely on wildly different firmware logic, mechanical tolerances, and internal architectures.
Our laboratory engineers deploy specific, brand-calibrated repair procedures to target these unique engineering behaviors:
Western Digital (WD): Bypassing Integrated USB & Encryption
- The Hardware Hurdle: Most portable WD drives (like the My Passport series) do not feature a standard SATA connector. Instead, the USB port and a hardware encryption chip are soldered directly to the main Printed Circuit Board (PCB).
- Our Repair Protocol: If the board suffers a short circuit or the USB port breaks, our technicians perform precision micro-soldering. Under magnification, we tap directly into the drive’s core SATA transmission lines on the board, routing them out to our diagnostic hardware while keeping the encryption chip active to prevent data scrambling.
Seagate: Resolving Seized Spindles & Firmware Loops
- The Hardware Hurdle: Seagate drives feature a compact mechanical design that makes them prone to a "seized spindle motor" or stuck heads if dropped. Additionally, their Media Cache architecture can get trapped in a permanent firmware lock loop when it hits corrupted data sectors.
- Our Repair Protocol: For stuck components, the drive is moved to our dust-free cleanroom where engineers use specialized mechanical tools to safely unstick the head assembly or cleanly migrate the platters to a matching donor chassis. For firmware loops, we link directly to the drive’s system terminal to patch its internal code via RAM commands.
Toshiba: Clearing G-Sensor Lockouts
- The Hardware Hurdle: Toshiba external lines (Canvio series) feature built-in hardware accelerometers (G-Sensors) designed to instantly lock the drive if motion is detected. A sudden drop can trap the drive in a defensive, non-responsive firmware loop.
- Our Repair Protocol: Much like WD, modern Toshiba portable drives utilize integrated USB boards. We convert the native board to a raw SATA path, allowing us to transmit low-level commands that clear out the persistent error logs trapped in the drive’s system memory, stabilizing the controller for data mirroring.
HGST / SanDisk Professional: Enterprise Multi-Platter Alignment
- The Hardware Hurdle: HGST and G-Technology drives spin at higher RPMs (7200 RPM) and often feature tight, multi-platter stacks. They use highly unique NVRAM chips on their PCBs containing custom adaptive alignment data for that specific drive's internal read/write heads.
- Our Repair Protocol: If the PCB fails due to power surges, a simple board swap will fail. Our technicians desolder the original microscopic NVRAM chip and cleanly transplant it onto a perfectly matched donor PCB. Mechanical repairs are performed with absolute precision to maintain the alignment of the multi-platter stack.
The Seattle Data Recovery Hardware Repair Process
Every physically damaged hard drive checked into our lab goes through a strict, controlled restoration pipeline:
- The Cleanroom Inquest: If a drive is clicking, grinding, or beeping, it is never powered on in a standard room. It is opened strictly inside an ISO 5 Cleanroom environment where airborne particles are filtered down to microscopic levels. This prevents dust from landing on the platters and permanently scratching away data.
- Donor Part Matching: Physical part replacements require an incredibly precise match. We maintain an extensive inventory of donor drives, matching not just the model number, but also manufacturing dates, site codes, and internal pre-amplifier revisions.
- Forensic Cloned Imaging: Repaired hard drives are highly unstable and are never meant to be returned to normal use. Once the drive spins up smoothly, it is immediately attached to a hardware imager to create a bit-for-bit digital clone. We extract your data safely from this healthy clone.
Emergency Guidelines: Protect Your Media from Permanent Loss
If your external or internal hard drive exhibits signs of physical failure, your very next action is critical to the survival of your files:
- Disconnect Power Immediately: If the drive is making unusual sounds (clicking, beeping, buzzing), pull the plug. Keeping it powered on can cause a broken read head to physically dig into the spinning platter, shredding your data into unrecoverable dust.
- Say No to DIY Software: File recovery programs are designed for healthy drives with deleted files. Forcing software to scan a drive with a physical head or firmware failure will rapidly overheat and permanently destroy the unit.
- Do Not Open the Drive Casing: Cracking open a hard drive cover outside of a certified cleanroom immediately ruins the drive's internal environment, exposing the platters to millions of microscopic airborne contaminants.
- Details
- Written by: Seattle Data Recovery
- Category: Data and Power Connectors
Objective: To completely desolder a physically mangled SATA/Power connector block and reflow a brand-new, factory-spec connector assembly onto the PCB.
Overview
If a hard drive connector is melted, corroded, or missing multiple pins but the copper anchoring pads on the PCB are completely intact, a complete SMT (Surface-Mount Technology) replacement is the cleanest solution. This restores the drive back to its original physical specifications, allowing it to be mounted into standard data recovery imaging hardware without the risk of loose umbilical cables or weak epoxy joints.
Operational Steps
- Thermal Shielding: Mask off all adjacent components—especially the fragile patient ROM chip and the main MCU—using high-temperature polyimide (Kapton) tape wrapped in aluminum foil to prevent accidental thermal reflow.
- Desoldering the Broken Port: Apply a generous amount of high-viscosity tacky flux to all signal pins and the large side structural grounding tabs. Using a hot-air rework station set between 330°C and 350°C, heat the entire plastic block uniformly. As the solder liquefies across all points, gently lift the entire connector block off the board with titanium tweezers.
- Pad Conditioning: Apply fresh solder flux to the bare pads. Run a clean desoldering copper wick over the pads with a flat-tip soldering iron to extract the original, dull lead-free factory solder, leaving the pads perfectly flat and silver. Clean the workspace with 99.9% IPA.
- Positioning the New Port: Place a pristine replacement SATA/Power combo connector onto the conditioned pads. Use a stereomicroscope to ensure perfect alignment across all 22 microscopic pins.
- Reflow and Joint Inspection: Apply a thin layer of liquid flux. Direct hot air at 310°C over the pins until the solder beneath the legs naturally liquefies and shiny, concave solder fillets form.
- Electrical Short Testing: Let the board cool for 5 minutes. Use a digital multimeter in continuity mode to trace each pin sequentially, checking for pin-to-pin shorts before mounting the board back onto the drive assembly.
Common Risks & Failures
- Solder Bridging: Due to the microscopic pitch between SATA data pins, applying even a micro-fraction too much solder will bridge two pins together, causing data corruption or communication failure upon spin-up.
- Thermal Board Warping: Uneven heating with the hot-air gun can warp the multilayer fiberglass PCB. A warped board will not sit flat against the internal HDA chassis pins, causing a total loss of power or head communication to the internal components.
- Details
- Written by: Seattle Data Recovery
- Category: Firmware (System Area)
Objective: To electronically isolate a physically dead head in a multi-platter drive through firmware manipulation, allowing the drive to boot safely on the remaining healthy heads.
Overview
When a hard drive with multiple platters undergoes a cleanroom head replacement, there are instances where one specific head from the OEM stack cannot read data due to severe media scratches on that particular platter surface. If left active, that single head will constantly attempt to read initialization tracks, causing the drive to click, time out, and scratch the platter further. Technicians can perform a Head Map Modification within the drive's RAM or ROM firmware, instructing the controller to bypass the dead head completely.
Operational Steps
- Backup System ROM: Read the drive's physical flash ROM via the terminal or a high-speed external chip programmer.
- Locate the Configuration Sub-Modules: Open the ROM binary or the initialization module (e.g., Module 0A or Volatile Head Map) in a hex editor or localized data recovery software.
- Edit the Bitmask: Locate the physical head configuration string (e.g., a byte array indicating
00 01 02 03for a 4-head drive). Change the value of the damaged head to an inactive mask byte (such as changing02toFF). - Adjust Head Count: Decrement the total head count variable in the master configuration block to match the new configuration.
- Write Modified Microcode: Flash the newly edited ROM back to the PCB or load the temporary head map configuration straight into the controller's RAM.
- Sub-Image Extraction: Power on the drive. It will initialize cleanly, skipping the zone of the failed head. Image all available data from the healthy heads first, minimizing the risk of total drive failure.
Common Risks & Failures
- Pre-amp Over-current: Changing a head map incorrectly can cause the PCB to send improper voltages to the internal preamplifier chip on the actuator arm. This can instantly burn out the head stack.
- Boot Rejection: If the master configuration module conflicts with individual adaptive parameter modules, the firmware will detect a structural mismatch and lock the drive down, necessitating a full factory firmware reload.
- Details
- Written by: Seattle Data Recovery
- Category: Firmware (System Area)
Objective: To repair corrupted low-level microcode modules residing on the hidden tracks of the platters, allowing the drive to initialize correctly.
Overview
The Service Area (SA), or System Area, is a reserved zone on the platters (usually on the outermost cylinder) that stores critical operational parameters. This includes the translator (which converts physical sectors to Logical Block Addressing), defect lists (G-List/P-List), and overlay modules required for full drive booting. If these sectors degrade or suffer micro-scratches from a failing read/write head, the drive cannot load its operating system, resulting in a persistent "Busy" (BSY) state, or it will spin down immediately after clicking.
Operational Steps
- Safe-Mode Initialization: Boot the drive into Kernel/Safe Mode by placing physical isolation tape over the PCB-to-HDA data contacts or shorting the read-channel points (Tx/Rx) on the board. This prevents the drive from reading the corrupted SA on the platters and locking up ACELab PC-3000.
- Establish Terminal Communication: Connect a specialized serial-TTL adapter to the drive's diagnostic pins to access the low-level boot ROM terminal interface.
- Dump the ROM: Read and backup the flash ROM architecture to extract the original module allocation maps and head configurations.
- Locate and Test SA Modules: Remove the data contact isolation tape, power cycle the drive into normal utility mode, and execute an SA surface scan. Identify unreadable or corrupt modules (e.g., Module 01 for configuration, Module 32 for translation in Western Digital drives).
- Write Regenerated Overlays: Obtain structurally intact matching modules from a verified firmware database repository. Force-write the healthy OEM overlay modules into the secondary/backup SA copy track (typically Copy B) on the platter surface.
- Re-link Dynamic Tables: Clear the smart attributes and recalculate the firmware module checksums to ensure the drive validates the new code during the next boot cycle.
Common Risks & Failures
- Checksum Mismatch: Writing a module with an improper or uncalculated checksum causes the drive's microcode to reject the module, inducing a permanent boot-loop.
- Overwriting Unique Adaptives: Overwriting module segments that contain drive-specific tuning matrices (such as head flying heights or preamplifier gain values) will render the native heads permanently blind.
- Details
- Written by: Seattle Data Recovery
- Category: Platters
Objective: To remove dust, fingerprints, smoke particles, and debris from the magnetic surfaces after a head crash or enclosure breach.
Overview
When a hard drive is compromised, microscopic particles settle on the platters. At operational speeds, a single particle of dust acts like a boulder, causing the read/write head to collide with the platter. Decontamination physically removes these contaminants without stripping the ultra-thin magnetic lubricant layer.
Operational Steps
- Extraction: Mount the drive securely in a cleanroom workstation. Remove the top cover using specialized torque-limiting drivers.
- Inspection: Use a high-intensity, monochromatic inspection light at an oblique angle to locate dust, film residues, or fingerprints.
- Solvent Application: Use ultra-pure, electronics-grade isopropyl alcohol (99.9% IPA) or specialized fluorinated solvents.
- Wiping Procedure: Saturate a lint-free, cleanroom-grade polyester swab. Wipe the platter surface using continuous, gentle radial strokes (from the inner hub to the outer edge). Never wipe in a circular motion, as this can track debris across data sectors.
- Drying: Use a clean, pressurized stream of filtered, ionized nitrogen gas to blow away remaining solvents and eliminate static charges that attract dust.
Common Risks & Failures
- Chemical Stripping: Over-saturation or using the wrong solvent can dissolve the protective carbon overcoat of the platter.
- Micro-Scratching: Reusing a contaminated swab can drag a trapped particle across the disc, permanently destroying data sectors.
- Details
- Written by: Seattle Data Recovery
- Category: Data and Power Connectors
Objective: To rebuild a cracked or shattered plastic connector housing and realign bent interface pins to allow temporary, safe insertion of data and power cables.
Overview
The L-shaped plastic shell surrounding SATA data and power pins is notoriously brittle. If a data cable is yanked at an angle, the plastic guide wall often snaps off, leaving raw copper contact pins exposed and floating freely. Without the plastic housing to enforce correct spacing and alignment, plugging a cable in will bend or bridge the pins, causing a severe electrical short circuit that can instantly destroy the drive's main MCU or the computer's power supply.
Operational Steps
- Mechanical Isolation: Unscrew the PCB from the hard drive chassis using precision Torx drivers. Place the bare board on a grounded, ESD-safe cleanroom mat.
- Micro-Pin Realignment: Under a high-magnification stereomicroscope, use ultra-fine titanium tweezers to gently bend any collapsed or twisted copper pins back into perfectly parallel alignment.
- Donor Housing Salvage: Take a OEM PCB of the same connector form factor. Using a hot-air rework station set to 280°C to 300°C with a wide nozzle, gently heat the underside of the OEM connector until the plastic housing can be separated from its structural pins (or use a precision blade to cleanly slice away the plastic guide wall).
- Epoxy Bonding: Carefully slide the salvaged plastic guide channel over the patient pins. Apply a microscopic droplet of structural, non-conductive, fast-curing cleanroom-safe epoxy or UV-curable acrylic resin along the fractured seam.
- Curing and Cleansing: Cure the resin using a focused UV light source. Once hardened, clean any residue off the copper contact pads using a lint-free swab saturated with 99.9% electronic-grade isopropyl alcohol (IPA) to ensure pristine conductivity.
Common Risks & Failures
- Solder Joint Fracturing: Bending a severely warped pin back into place can introduce metal fatigue, causing the pin to snap or fracturing its structural surface-mount solder pad on the PCB.
- Adhesive Contamination: If any epoxy smears onto the top face of the copper contact pins, it will act as an electrical insulator, blocking the SATA cable from making an electrical connection.
Subcategories
Platters
- What it is: Flat, circular metal or glass discs coated in a magnetic material that physically store all digital data.
- Common failures: Head crashes (where read/write heads scratch or gouge the magnetic surface), bad sectors (unreadable data blocks), and physical warping from severe heat or drops.
Read/Write Heads
- What it is: Tiny sensors mounted on the tip of the actuator arm that float a microscopic distance above the spinning platters to read and write data.
- Common failures: Head crash (contact with platters), head stiction (heads getting permanently glued or stuck to the platter surface), and actuator/head degradation causing clicking or beeping noises.
Actuator Arm & Voice Coil Actuator
- What it is: A mechanical arm that sweeps the read/write heads rapidly and precisely across the surface of the platters, controlled by a magnet and coil assembly.
- Common failures: Failed actuator motor/assembly, mechanical binding, or inability to track and position the heads accurately.
Spindle Motor
- What it is: The motor located beneath the platters that spins them at high speeds (typically 5,400 to 7,200 RPM).
- Common failures: Seized motor (failure to spin up, often making a faint ticking, beeping, or humming sound) or worn bearings that cause grinding noises and wobbling platters.
Printed Circuit Board (PCB / Controller Board)
- What it is: The external green or black circuit board attached to the bottom of the drive that translates signals, controls the motor, and manages data flow.
- Common failures: Electrical short circuits or component burn-out caused by power surges, static discharge, or a faulty power supply, which can render the drive completely dead ("no power/no spin").
Firmware (System Area)
- What it is: Low-level internal software stored on a reserved portion of the platters and PCB that boots the drive and tells the heads how to operate.
- Common failures: Firmware corruption from bugs, improper updates, or unexpected power loss, which causes the drive to spin up but fail to be recognized by the computer.
Cache Memory (DRAM)
- What it is: A small, high-speed volatile memory chip on the PCB that temporarily holds frequently accessed data.
- Common failures: Data corruption or chip failure due to voltage spikes or overheating.
Air/Breather Filter
- What it is: A tiny internal filter that equalizes internal air pressure with the outside while trapping microscopic dust particles.
- Common failures: Clogging or seal failure that lets dust and moisture inside, leading to platter contamination and corrosion.
Data and Power Connectors
- What it is: The physical pins/ports that plug the drive into the computer's motherboard and power supply.
- Common failures: Bent or broken pins, loose cable connections, or corroded contact pads.